# How to Update Your AirPods Firmware Manually: A Comprehensive Guide
Apple’s AirPods have established themselves as essential devices in the realm of wireless audio, providing both convenience and high-quality sound for music aficionados and podcast fans. To guarantee that users take advantage of the latest enhancements and features, Apple releases firmware updates for its AirPods regularly. While these updates usually install automatically in the background, numerous users may not be familiar with how to manually initiate an update. Luckily, Apple now offers straightforward guidelines for accomplishing this task.
## Reasons to Update Your AirPods Firmware
Firmware updates can boost the functionality of your AirPods, resolving issues, extending battery life, and introducing new functionalities. Keeping your AirPods current ensures you experience the finest performance with your device.
## Step-by-Step Guide for Updating AirPods and AirPods Pro
Apple has provided a simple six-step method for upgrading the firmware on AirPods and AirPods Pro. Follow these steps:
1. **Confirm Bluetooth Connectivity**: Ensure your AirPods are within Bluetooth proximity of your iPhone, iPad, or Mac that is linked to Wi-Fi.
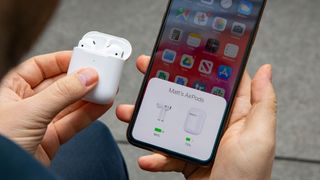
2. **Insert AirPods in Charging Case**: Place your AirPods in their charging case and close the lid.
3. **Connect to Power Source**: Attach the charging cable to your charging case, then connect the opposite end to a USB charger or port.
4. **Wait for the Update to Complete**: Keep the lid of the charging case shut and wait for at least 30 minutes for the firmware update to occur.
5. **Reconnect Your AirPods**: Open the lid of the charging case to reconnect your AirPods to your iPhone, iPad, or Mac.
6. **Verify Firmware Version**: After reconnecting, check the firmware version to verify that the update was successful.
Should you face challenges during the update process, Apple suggests resetting your AirPods and attempting the process again.
## Updating AirPods Max Firmware
For AirPods Max users, the update process differs slightly but remains straightforward. Here’s a five-step guide:
1. **Confirm Bluetooth Connectivity**: Ensure your AirPods Max are within Bluetooth range of your iPhone, iPad, or Mac that is connected to Wi-Fi.
2. **Connect to Power Source**: Insert the charging cable into the bottom-right earcup of your AirPods Max, then connect the other end to a USB charger or port.
3. **Allow Time for the Update**: Wait at least 30 minutes for the firmware to update.
4. **Reconnect Your AirPods Max**: Reattach your AirPods Max to your iPhone, iPad, or Mac.
5. **Verify Firmware Version**: Finally, check the firmware version to ensure the update is confirmed.
## Automatic Updates Remain Active
While these manual update processes are available, it’s crucial to recognize that firmware updates will continue to install automatically for most users. However, having the option to manually trigger an update can be advantageous if you want to ensure you’re using the latest version right after its release.
## Conclusion
As the next firmware update approaches, you can prepare to keep your AirPods or AirPods Max up to date. Following these easy steps will help you sustain optimal performance and enjoy all the new features that Apple provides.
Have you ever manually updated your AirPods firmware? Feel free to share your insights in the comments section below!
### Top AirPods Pro Deals and Accessories
For individuals looking to elevate their AirPods experience, explore the latest deals and accessories available. Maintaining your AirPods in excellent condition can greatly improve your listening enjoyment.
—
*FTC: We utilize income-generating auto affiliate links. More information can be found on our website.*