Hi, friends! Welcome to Installer No. 122, your guide to the best and Verge-iest stuff in the world. (If you’re new here, welcome, go ‘Zona, and also you can read all the old editions at the Installer homepage.) This week, I’ve been reading about early Apple employees and weather apps and one-page productivity systems, watching […]
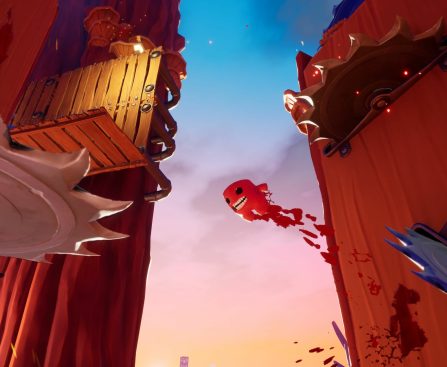
Super Meat Boy 3D Turns Suffering into Fun
The original Super Meat Boy is one of the best-known indie games of all time. Released in 2010, it’s a brutally difficult 2D platformer, but so fun to play: The short levels almost feel like speedrunning puzzles, and even though they’re filled with traps and buzzsaws, dying isn’t so bad because you revive nearly instantly. […]
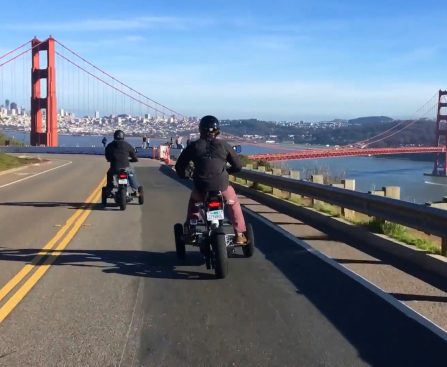
Sway Motorsports’ Condition After Shark Tank: Updates After Season 6
In Season 6 of Shark Tank, which aired in 2014, Sway Motorsports garnered attention as a potentially transformative player in the realm of dependable and secure urban transport. The offering was an electric three-wheeled scooter. A participant on the show, one of the “sharks,” expressed enough interest to propose a deal. However, that arrangement never materialized post-show. This can occur when a deal fails to pass a follow-up due diligence phase, wherein both sides assess their mutual understanding and weigh the risks against the benefits. The reasons behind the deal’s failure to close are unclear, but it appeared to signal the demise of Sway Motorsports. These scooters never entered production.
What distinguished Sway Motorsports was its unique three-wheel vehicle design. The episode claimed that this configuration rendered them safer than conventional two-wheeled scooters, such as the all-terrain electric scooter from Segway. The scooters were capable of traveling up to 60 miles on a single battery charge and could reach speeds of 60 mph. Their ability to carry bags and allow the rider to remain stationary without the need for balance made them seem perfect for urban commuting. The “sway” in the name derived from the fact that riders could lean to steer the scooter.
Details of the Sway Motorsports Shark Tank deal
Sway Motorsports was showcased on Shark Tank by founder Joe Wilcox, who aimed to transform urban transport similarly to how RocketSkates sought to in Season 7. Wilcox had already manufactured and presold some of these scooters and could demonstrate their functionality. He aimed to sell them via dealerships for $7,999 each. He requested $300,000 from the panel of potential investors in exchange for a 10% equity stake in the company. The purpose of the funding was to assist Sway Motorsports with its manufacturing processes.
The sharks were largely doubtful. Many felt that Sway Motorsports was unlikely to achieve successful production, although they found the concept quite intriguing. When Mark Cuban expressed a desire to see the company expand further, Wilcox successfully persuaded him to invest now for a larger percentage: 20%. Despite Cuban’s agreement, the deal ultimately fell apart after the show.
Sometimes entrepreneurs on Shark Tank who do not secure a deal still manage to find success. For instance, the creator of RocketSkates received no deal, decided to abandon the skates, and has since continued to develop other urban transport innovations. In the case of Sway Motorsports, however, the outcome has clearly been unfavorable. From what is visible, the company seems to no longer operate.
Does Sway Motorsports have a future?
Upon investigating whether Sway Motorsports has any intentions of bringing these scooters to production in the future, we encountered rather bleak information. Sway Motorsports’ website seems to be entirely nonfunctional — the page fails to load. The company’s last post on Facebook dates back to 2017, promoting an event featuring the brand. The final Instagram post and the most recent YouTube uploads are also from 2017. Throughout the years, numerous commenters on these social media platforms have inquired about purchasing the electric scooters and the company’s operational status. None of these queries have received a response.
Joe Wilcox maintains a professional profile on LinkedIn. His career history is notable, with experience as an industrial designer for NASA and MIT, as well as time spent as a toy inventor and designer at IDEO. Sway Motorsports is detailed in his career history, indicating he served as the Founder and CEO from 2013 to 2018. There is no LinkedIn business page for Sway Motorsports, suggesting it is unlikely that the company has undergone any ownership transitions.
The shortage of urban transport options is a persistent challenge in many cities, paired with the difficulty and cost of finding parking. This issue has driven Elon Musk’s Boring Company to develop underground tunnels for personal public transportation between major city landmarks. It appears that Sway Motorsports will not be part of this initiative.
Top Gay Dating Apps of 2026: Grindr Remains King (Even If Sometimes We Wish It Didn’t)
From Grindr to Scruff to Archer, here’s our unfiltered guide to the best gay dating apps.

Anthropic Argues for Anthropomorphizing AI in ‘Unsettling’ Research Paper
In the AI community, there’s a long-held taboo against anthropomorphizing AI. In a new research paper, Anthropic argues that maybe we should.

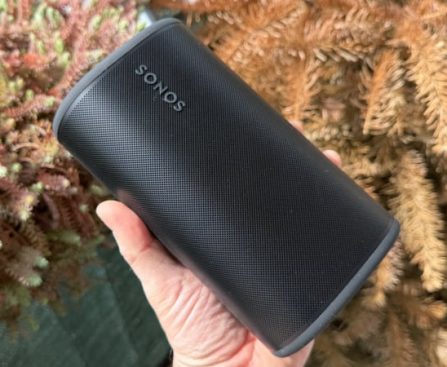
Review: I Tried the New Sonos Play Speaker, Part of the Audio Company’s Big Comeback
Sonos Play is the company’s new portable speaker, sitting in between the massive Move 2 and the smaller Roam 2. We’ve spent a week with it so far.
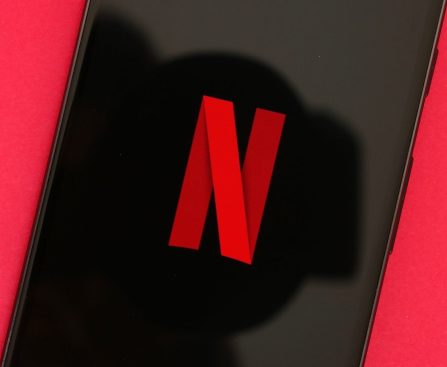
Netflix Obligated to Reimburse Millions of Subscribers After Historic Court Decision
Italy has gained attention with a significant court decision against Netflix, deeming the streaming giant’s price increases from 2017 to 2024 unlawful. The court in Rome determined that Netflix did not provide specific, justifiable reasons for these hikes in its contracts, breaching Italy’s Consumer Code. Consequently, long-standing Italian subscribers are expected to receive considerable refunds, with Premium plan users possibly getting as much as €500 and Standard plan users up to €250.
Netflix is now under a 90-day obligation to inform all affected customers via its website and national media, or it will face a €700 daily penalty. This ruling follows closely after Netflix’s recent price increases for U.S. subscribers, underscoring the global scrutiny the company encounters regarding its pricing policies.
The Italian consumer organization Movimento Consumatori brought forth the lawsuit, contending that Netflix’s contracts did not sufficiently detail potential future price shifts. The court’s ruling requires Netflix to restore prices to their pre-increase amounts, such as lowering the Premium plan from €19.99 to €11.99.
While Netflix intends to contest the ruling, it has revised its contract terms since April 2025 to better outline future price changes, suggesting that price hikes after this date may be allowed. Nevertheless, the ruling currently pertains only to Italy, leaving subscribers in other areas subject to the most recent price modifications unless similar legal measures are initiated locally.
Clues and Solutions for Hurdle – April 4, 2026
Hints and answers to today’s Hurdle all in one place.

Wordle Today: Answer and Hints for April 4, 2026
Here’s the answer for “Wordle” #1750 on April 4 as well as a few hints, tips, and clues to help you solve it yourself.

NYT Strands Clues and Solutions for April 4, 2026
The NYT Strands hints and answers you need to make the most of your puzzling experience.