Yuliia24/Shutterstock
While electric vehicles strive for a place in the mainstream automotive landscape these days, it may astonish you to discover that this contention has roots going back almost 200 years. Indeed, battery-driven propulsion originates from the formative era of the horseless carriage. As steam and internal combustion engines first competed to take the place of horses, early innovators were already advocating for the electric motor.
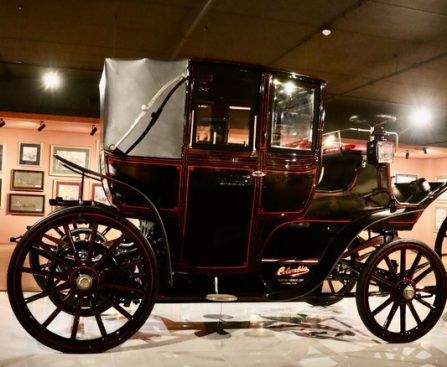
The initial electric vehicle was crafted by Robert Anderson, and although it was essentially a prototype deemed rudimentary for its time, it marks the beginning of today’s electric vehicles. By the late 1800s, electric cars became more common as manufacturers learned how to design, produce, and market them effectively. In the early 1890s, William Morrison developed the first electric car in the United States. Drawing inspiration from the horse-drawn carriages that preceded it, this vehicle was essentially an electric wagon. Unlike conventional automobiles, it lacked a front end because there was no engine. The driver positioned themselves where a typical buggy driver or chauffeur would sit, steering the electric vehicle from that point. It could accommodate six passengers and achieved a maximum speed of 14 miles per hour. In contrast, today’s high-powered EVs can supply energy to your home in case of an emergency.
The advantages and disadvantages of early electric vehicles